
 By Sebi Makis
Bathroom ceiling fans don’t just whirl for show. They keep the air flowing, pull out moisture, and help prevent mould from showing up in damp corners.
Over time, though, they get coated with dust and sticky grime. That buildup drags performance down and locks in moisture, unpleasant odours and mildew inside.
No one wants that. That’s why this guide will show you exactly how to clean your bathroom ceiling fan step by step. So, keep reading to learn some new hacks.
Why Cleaning Your Bathroom Ceiling Fan is Essential
Bathroom fans face more steam, heat, and humidity than most appliances in your home. That mix makes them magnets for grime.
As time passes, dust, lint, and even random hairs start clinging to the blades and inside the casing. When all that gunk combines with hot shower steam, it sticks like glue and spreads across every corner of the fan.
That buildup does more than just make your fan look grubby. A dirty fan doesn’t move air well, and when the airflow slows down, the motor has to work harder. This extra strain can raise your utility bills and wear the unit down faster.
With reduced airflow, moisture tends to linger longer, which increases the chance of mould forming behind walls or on ceilings. That causes musty smells and can worsen breathing problems for people with asthma or allergies.
As the buildup increases inside the unit, problems start to pile up fast. That’s why regular cleaning isn’t just about keeping it shiny. It also protects your health and helps the fan work as it should.
Essential Cleaning Supplies
The job gets easier when you have all the tools you need from the start. It is not a long list, but each item makes a difference.
Get a sturdy step ladder that gives you solid support while reaching the ceiling, and avoid anything wobbly. A vacuum cleaner with a brush attachment helps pull off loose dust before it scatters around the room.
Microfibre cloths are useful for wiping surfaces without scratching them. Their soft texture grabs dust and holds onto it, instead of just pushing it around.
For an effective cleaning mix, warm water with a few drops of dish soap works well. It breaks down grime without harming any plastic or metal parts.
If the fan has signs of mildew, white vinegar is another good choice. It is strong enough to clean but gentle enough not to ruin finishes.
For detailed areas, an old toothbrush is great for scrubbing corners, edges, and tight spots near the motor.
If you deal with allergies, wearing a mask during cleaning helps you avoid breathing in dust, which adds an extra layer of protection.
Safety First: Proper Preparation
Before climbing the ladder or grabbing tools, you should keep some safety steps in mind. The most important one is cutting the power.
Do not rely on the wall switch alone, though. For full protection, go to the circuit breaker and turn off power to the fan completely. This prevents any chance of electric shocks.
Once the power is off, move the step ladder directly under the fan. Place it on flat, steady flooring and check that it does not wobble. Lock the legs in place and avoid using the top two steps. For higher ceilings, an extension ladder with stabilising feet provides better support.
Then, wait until the fan blades stop moving completely. Even a slow spin can throw things off. If someone is around, having them hold the ladder for extra stability can be helpful.
However, if the setup feels unsafe or the ceiling is too high, hiring a professional cleaner is a smart option. They have the expertise needed to effectively clean a bathroom ceiling fan without compromising your safety or damaging any of the components.
How To Remove the Fan Cover
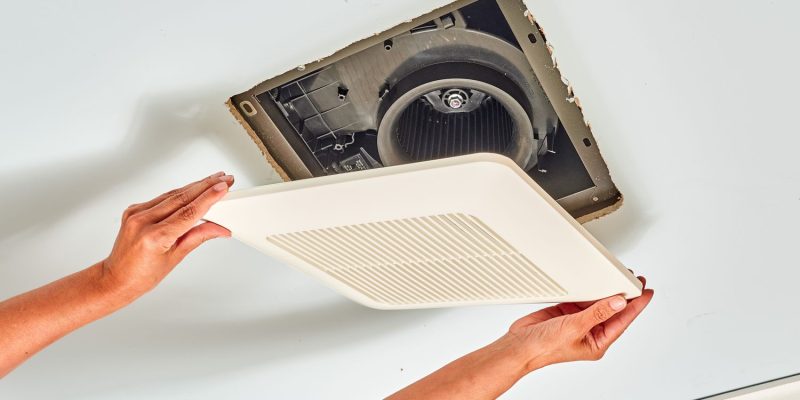
Most fan covers attach with either spring clips or screws. Figuring out the type you’re dealing with is the first step to removing it correctly.
If the cover uses spring clips, grip the edges gently and pull downward until the springs release. Once it comes loose, twist it counterclockwise to remove it.
In contrast, for screw-on models, grab a screwdriver and turn each screw slowly to avoid stripping them. Keep the screws in a small container to prevent them from rolling off or getting lost.
Occasionally, some fans hide extra clips or fasteners behind the cover. If it does not come off easily, stop and look for anything holding it in place. In any case, do not force it. Prying too hard could crack the plastic or damage the fan.
To stay organised, taking a photo before and during each step will help you during reassembly. Some fans are easy to put back together, while others have pieces that only fit back one way. So, those pictures will act like a map in case anything feels confusing later on.
Fan Blades and Cover: Step by Step Cleaning
With the cover removed, you’ll be able to spot all the accumulated dust. Often, it looks worse than expected, but don’t worry, since this is easy to fix.
Begin with the cover by soaking it in a sink filled with warm, soapy water. Let it sit for a few minutes before wiping it down with a microfibre cloth.
To protect the material, avoid harsh chemicals. Bleach or strong cleaners can weaken plastic and cause discolouration.
After handling the cover, move on to the blades. Dip a clean cloth in the same soap solution, wring it out, and wipe each blade from the centre toward the tip. This will keep dirt from sliding toward the motor.
For tighter spots, use the toothbrush to get into corners or hard-to-reach spaces around the hub and motor. These areas tend to accumulate more grime than flat surfaces.
Once every surface is clean, rinse it with fresh water and dry each one thoroughly with a towel or let them air dry. Wet parts should never be reattached, as any moisture you leave behind can create electrical problems or cause the fan to fail early.
Reassemble and Test Your Fan
After everything has dried, it’s time to put the parts back. To start, line up the fan cover with the housing. If it connects with springs, squeeze them and guide the cover into position until it clicks securely.
If the mechanism includes screws, put each one back in and tighten slowly. Take care during this step and avoid over-tightening, which can crack the plastic or strip the threads.
Once the cover is secure, return to the circuit breaker and switch the power back on. Turn the fan on and listen closely. It should run smoothly with no rattles, squeaks, or strange vibrations. If something sounds off, shut off the power again and check for loose or misaligned pieces.
That said, if the sound or airflow still feels off, calling an electrician might be the safest move. A clean fan should work quietly and efficiently without wobbling or buzzing.
Conclusion
Scrubbing your bathroom ceiling fan might not win you any applause, but it will keep the air moving and stop the grime from taking over.
Clearing out all that dust helps the fan do its job without working too hard or burning extra energy.
So, set the ladder, gather your tools, and follow our step-by-step guide. That little bit of effort now will help the whole bathroom stay cleaner, longer, without surprise odours later on.